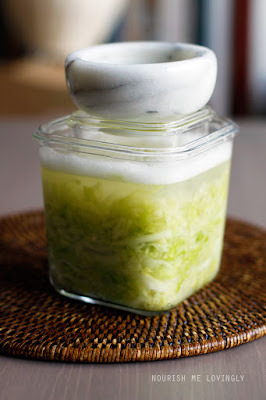
Basic, two-ingredient handcrafted sauerkraut
It took me a good while to spell the name of this yummy 'sour cabbage' right. Too many consonants got me twisted a few times, but now we are clear, so clear that misspelling could not happen even if I would be shaken up from my deepest dream.
This fermented cabbage dish (the sugars in the cabbage are fermented into lactic acid) has a long history in Eastern European and German cuisines, with many health benefits, like stimulating stomach acid production, promoting the growth of healthy intestinal flora, by containing probiotic bacteria, digestive enzymes, vitamins (like C, Bs, K).
Both of my grandmothers used to make sauerkraut every autumn which lasted throughout the winter, providing us with vitamins and a tasty side dish, soup or main course ingredient. It is really simple and easy to make sauerkraut at home, and it is very inexpensive. A good quality, additive-free, store-bought, raw, organic sauerkraut (like Raw Health or The Cultured Cellar) is very pricey in my opinion, compare to how much an organic cabbage costs.
You will need:
1 medium head white cabbage
1 tbsp coarse Himalayan rock salt
1. Discard the two outer leaves of the cabbage, then cut it in half, cut out the tough central core, discard.
2. Finely cut the cabbage into thin, long strips (see below), and put them into a large enough glass bowl.
3. Add the salt, and start to knead. Knead for about 10 to 15 mins, until juice comes out of the cabbage, and it softens. It should look like below:
4. Tightly pack the cabbage into a glass container, and pour the juice on top. Make sure to leave some space on top, the cabbage will expand, and may froth.
5. Put something on top to push the cabbage down so the cabbage is well under its own juice. Is should be completely submerged. I used a glass bowl to push the cabbage down.
6. Put something heavy on top of your cabbage-pusher. I used my marble mortar to keep my cabbage-pusher pushing.
7. Place the glass container into a safe place where it can ferment undisturbed for a week. Loosely cover with a muslin, cheese cloth or kitchen towel.
See you in a week or so with the results of my handcrafted sauerkraut. So excited!
[i] For more GAPS recipe ideas please visit my GAPS recipes selection.
UPDATE: After 10 days my handcrafted sauerkraut deemed to be ready. There was not much action in the first few days except little air bubbles were sitting on the kneaded cabbage strips. After 5 days a white, frilly layer started to form of the top which I have removed. It needed skimming every two days.
The results are a bit disappointing. The sauerkraut is missing the zest, the vigour I was expecting. It feels a bit tired. Not as crunchy as I was expected it would be. Maybe I have over kneaded, maybe the temperature wasn't right, or simply trying one single cabbage in a glass container for 10 days isn't going to produce the same results as fermenting 20 cabbages in a wooden barrel would. I am not giving up...


No comments:
Post a Comment